Three Capes Track for FREE: 4-Day Itinerary + Map
The Three Capes Track is one of our favourite hikes in all of Australia! It’s a whole experience, with some of the most amazing views we’ve ever seen in Australia.
We tackled it during a 2-month trip around Tassie, and it was high on our list from the start.
The only problem is that the paid version was $500 back then (now it’s +$600), so wayyy more than we wanted to spend.
After heaps of research, we found that the paid walk follows a similar track you can hike independently and for free.

But that option isn’t explained very clearly online. The official website pushes you toward the paid version, which is often booked out.
Now, doing it for free was the best decision for us, as “intermediate hikers”. The tracks are very well maintained and there are designated camping areas (that need to be booked in advance.

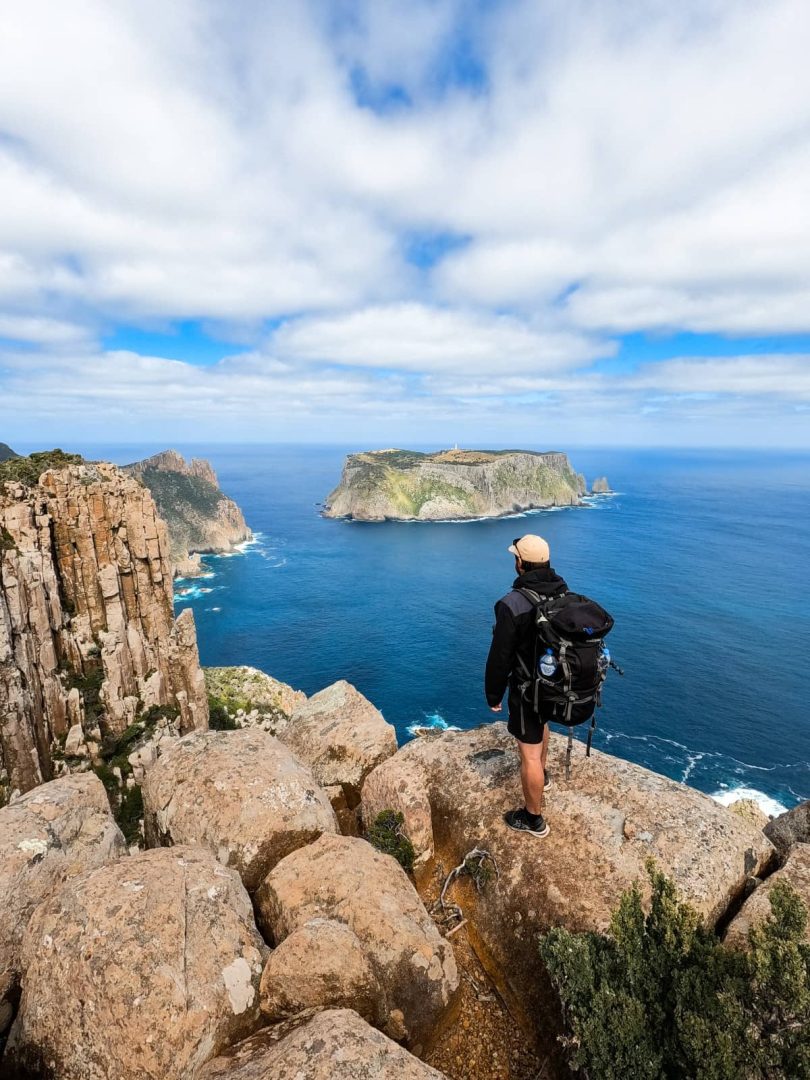
Tasman Island from Cape Pillar Path condition is amazing
This guide has out exact 4-day itinerary, where we camped, what permits you need, what to book in advance, and what to know before you go.
There’s also a free map you can save to your phone so you can see the whole route at a glance!
We recognise the traditional owners of the lands we’re exploring in Turrakana/Tasman Peninsula, the Palawa People.
Who should do the free version?
The official Three Capes Track actually covers two capes, Cape Pillar and Cape Hauy.
Cape Raoul is a separate hike near Port Arthur, it’s not included in the Three Capes Track. Many people get confused with this. It’s just as impressive and 100% worth doing the day hike, though!
The free version is for you if you are:
- Comfortable planning your own route and logistics (your going to need someone to drop you at the trailhead)
- Don’t mind camping and long drop toilets
- Happy to carry your own food and gear
- Prefer moving at your own pace than being on a fixed group schedule
For us, that was also part of the appeal! Apart from saving money, of course.
But the paid version is best for people who:

- Want everything organised for them
- Don’t want to do their own cooking
- Want to carry a lighter pack each day
- Prefer proper beds and a cabin vs a tent
- Prefer hiking with a guide
You’ll have an incredible experience either way! Both cover the similar route, but they suit very different travel styles.
So if, after reading this, you realise you prefer doing the paid version, we recommend booking directly with Tasmania Parks & Wildlife.
There are also private operators running similar trips, but they’re at least twice as expensive!
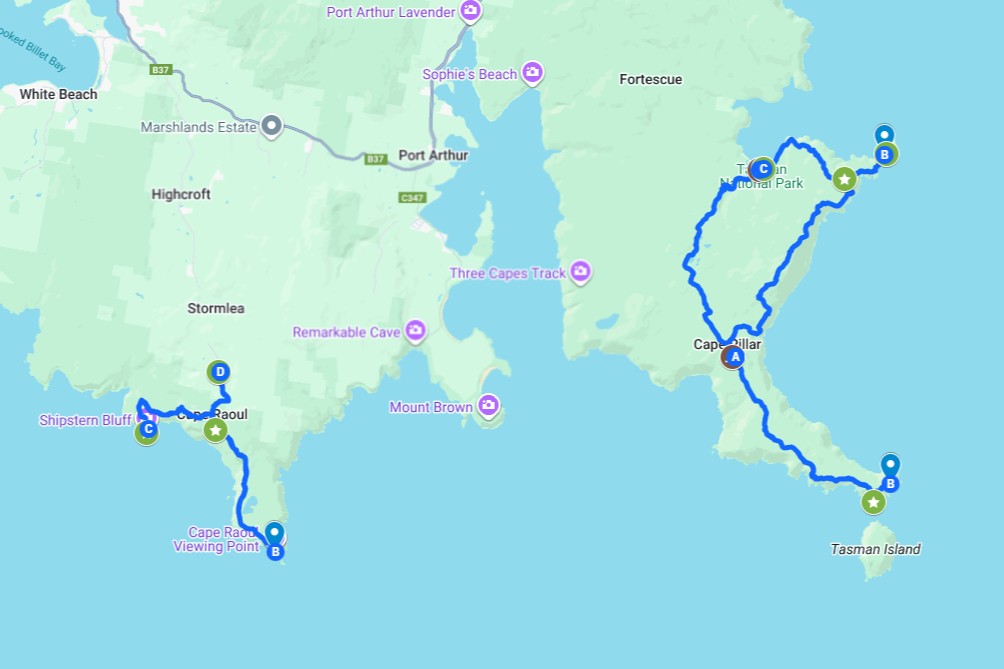
4-day itinerary of the free Three Capes Track
This is the exact itinerary we’d recommend for tackling the three capes for free:
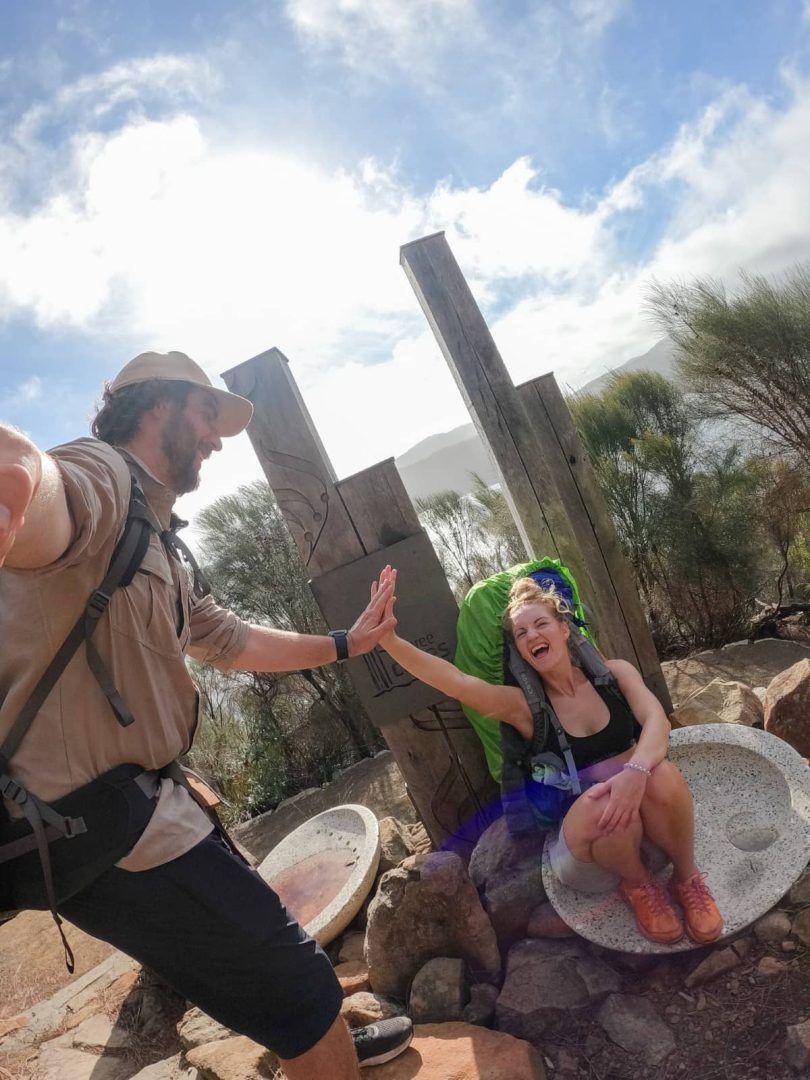
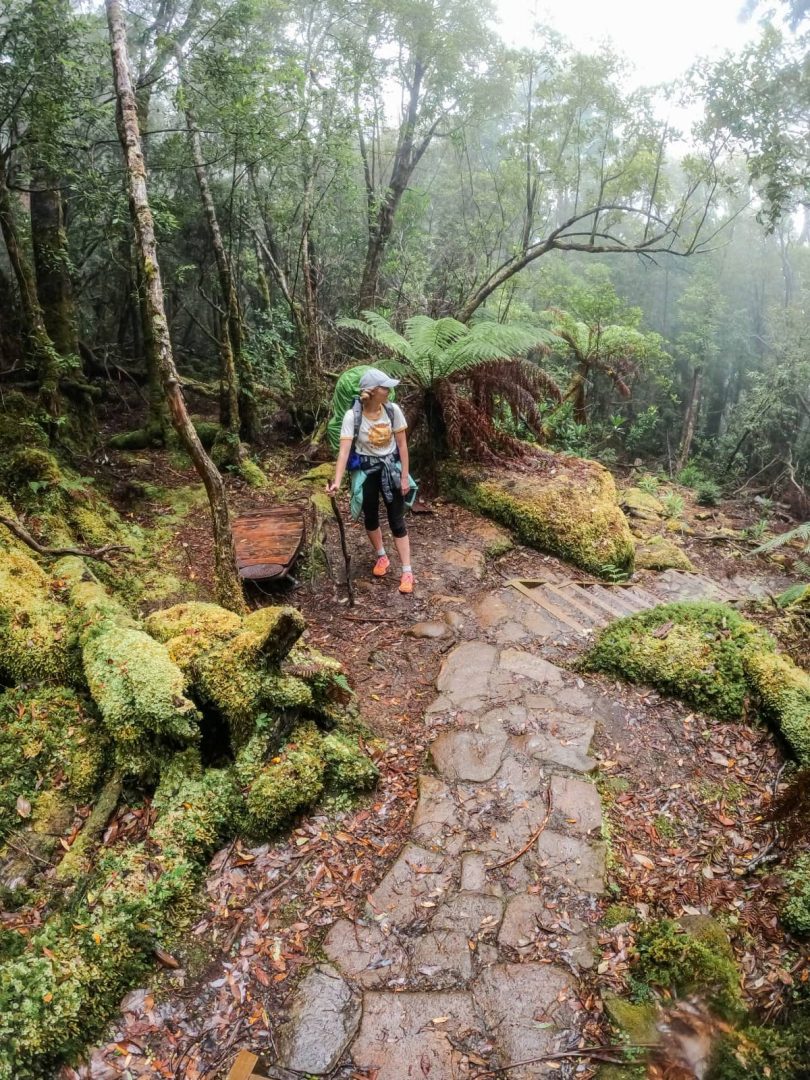
Day 1: Fortescue Bay to Bare Knoll Camp (9km, 3-4 hours)
Day 1 is basically the first section of the Cape Pillar hike, which is 29km total. We recommend breaking it into two days, it’s way easier on the body!
Also, the next two days are the hardest of the hike. You’ll want to take it easy today, set up camp without rushing, eat well, sleep early, and start day 2 fresh.
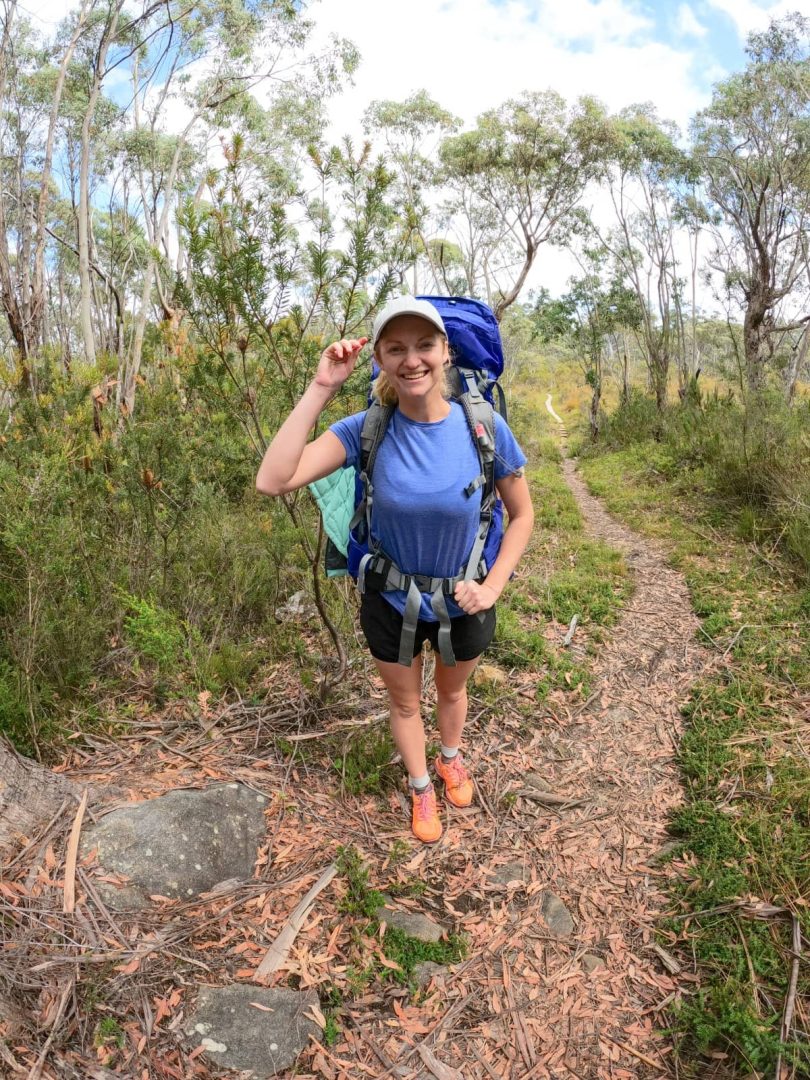
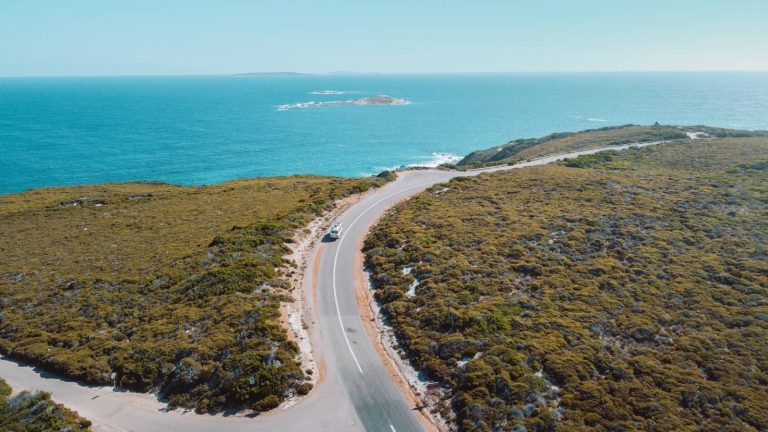
You’ll start at Fortescue Bay, which is where you’ll get dropped off or leave your vehicle for the rest of the hike. If you’re parking there, make sure you leave your park pass visible.
Once there, all the signs explain the direction you must take for the hike. The instructions on the website are confusing as hell, but we promise it’s very straightforward in person.
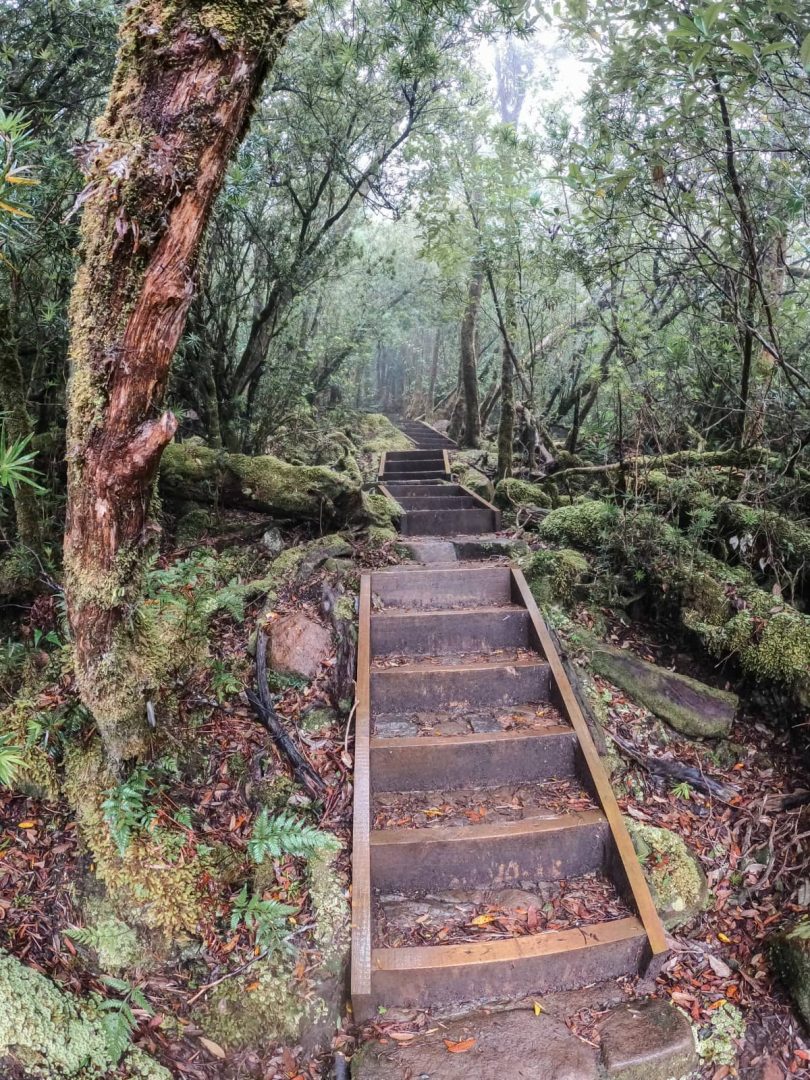
The track heads inland through the forest rather than straight to the coast.
Bare Knoll Camp is free and surprisingly well set up. There are raised tent platforms, toilets, and rainwater tanks.
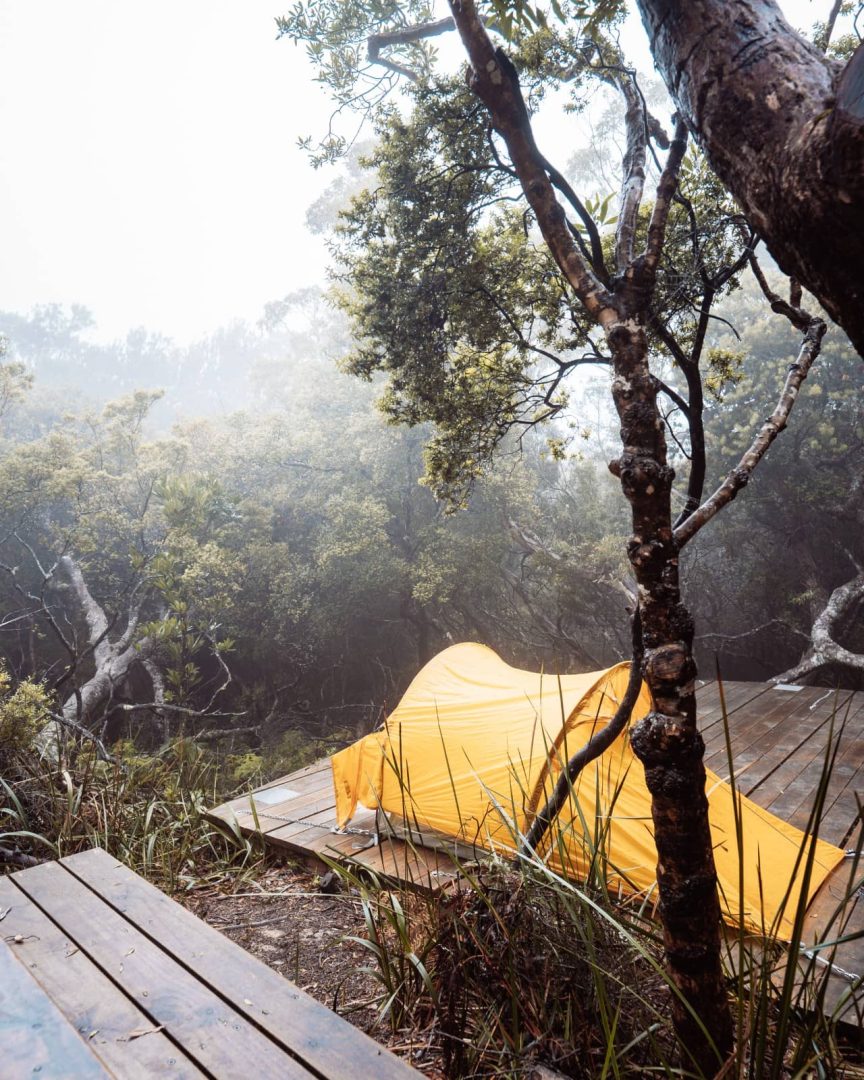
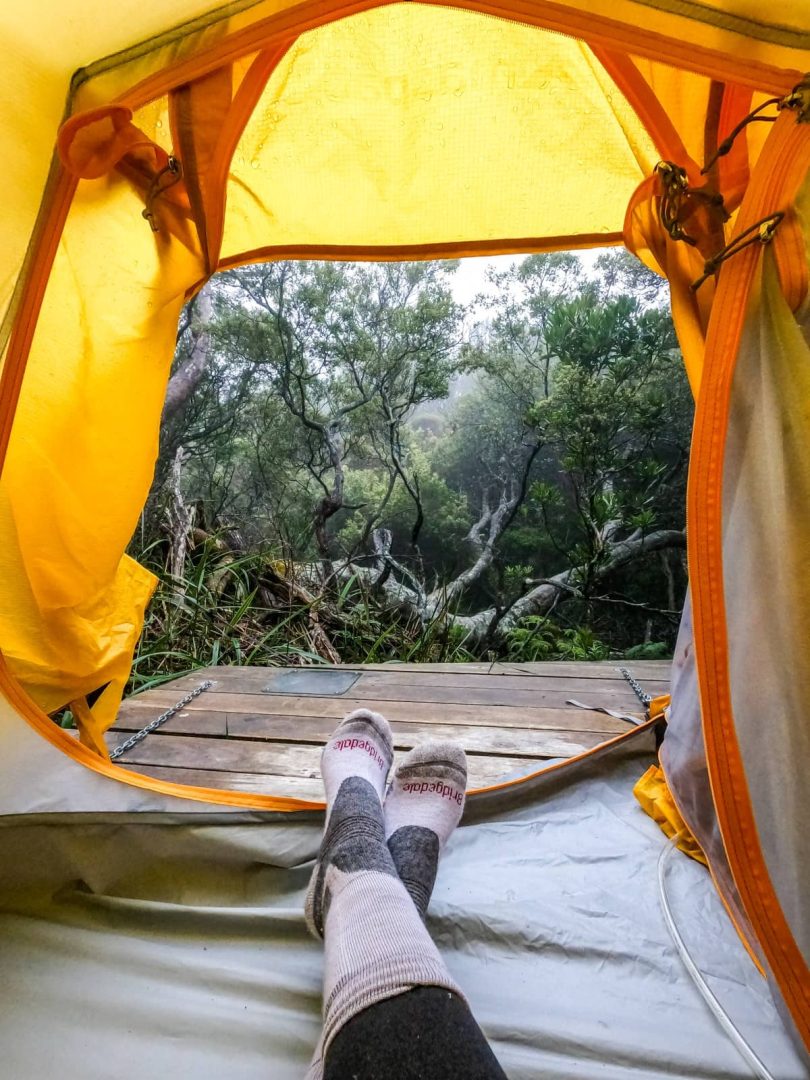
The camp sits quietly in the forest, and after a big coastal day yesterday, it felt like the right place to slow things down.
Now, you might see references online to Wughalee Falls Camp as an alternative.
It used to be an option, but it’s been closed since 2022 due to safety concerns. Everyone is now directed to Bare Knoll instead, so try to get there early to pick a good spot.
Day 2: Cape Pillar Day Walk (20km, 7 hours)
This is the reason most people do the Three Capes Track in the first place, and boy, it overdelivers!

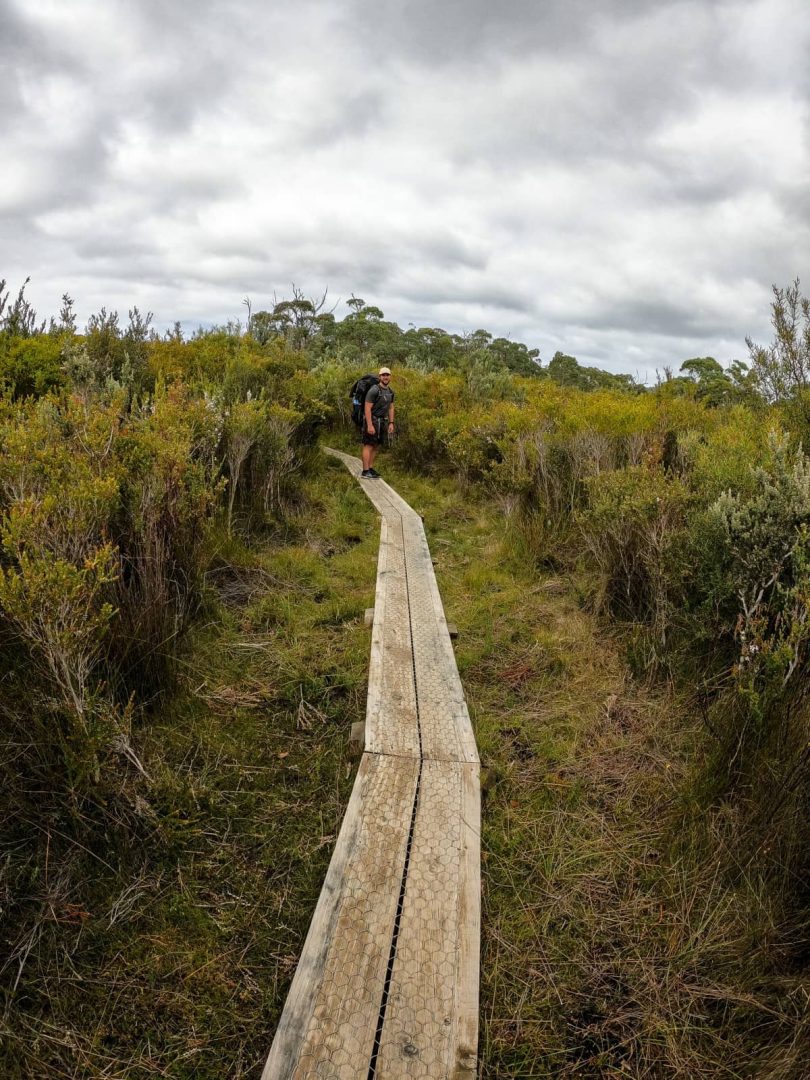
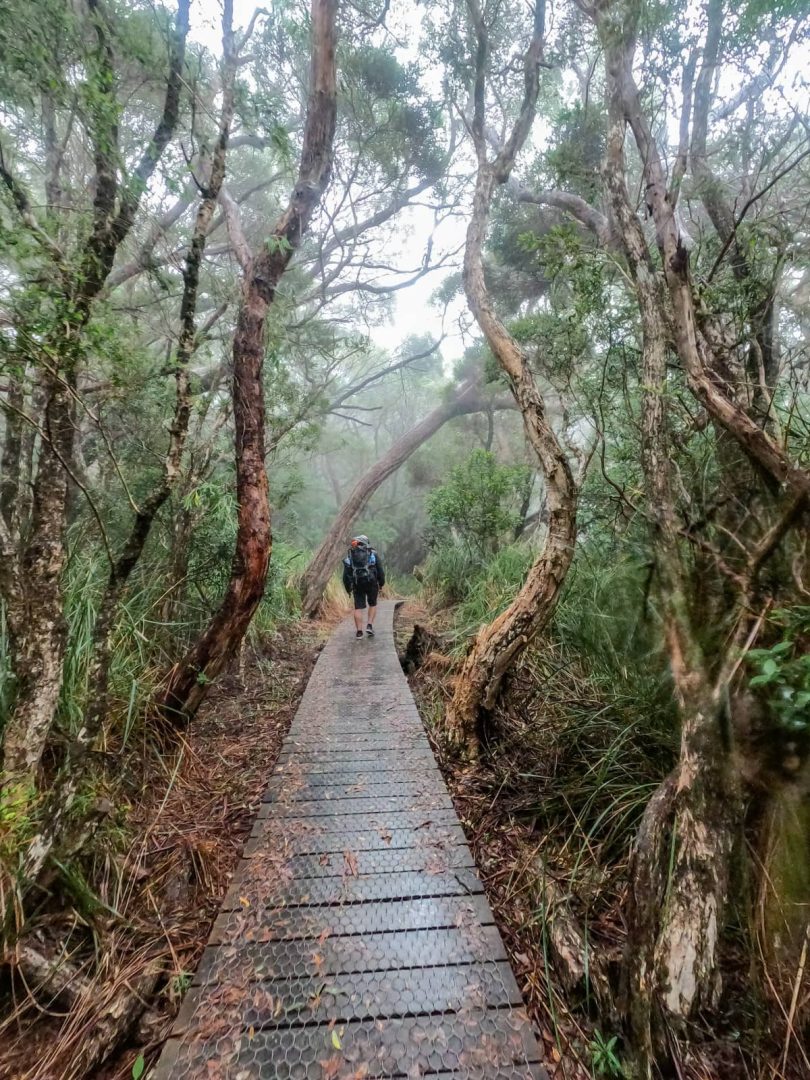
The walk itself is very straightforward, with stretches of forest and long boardwalk sections.
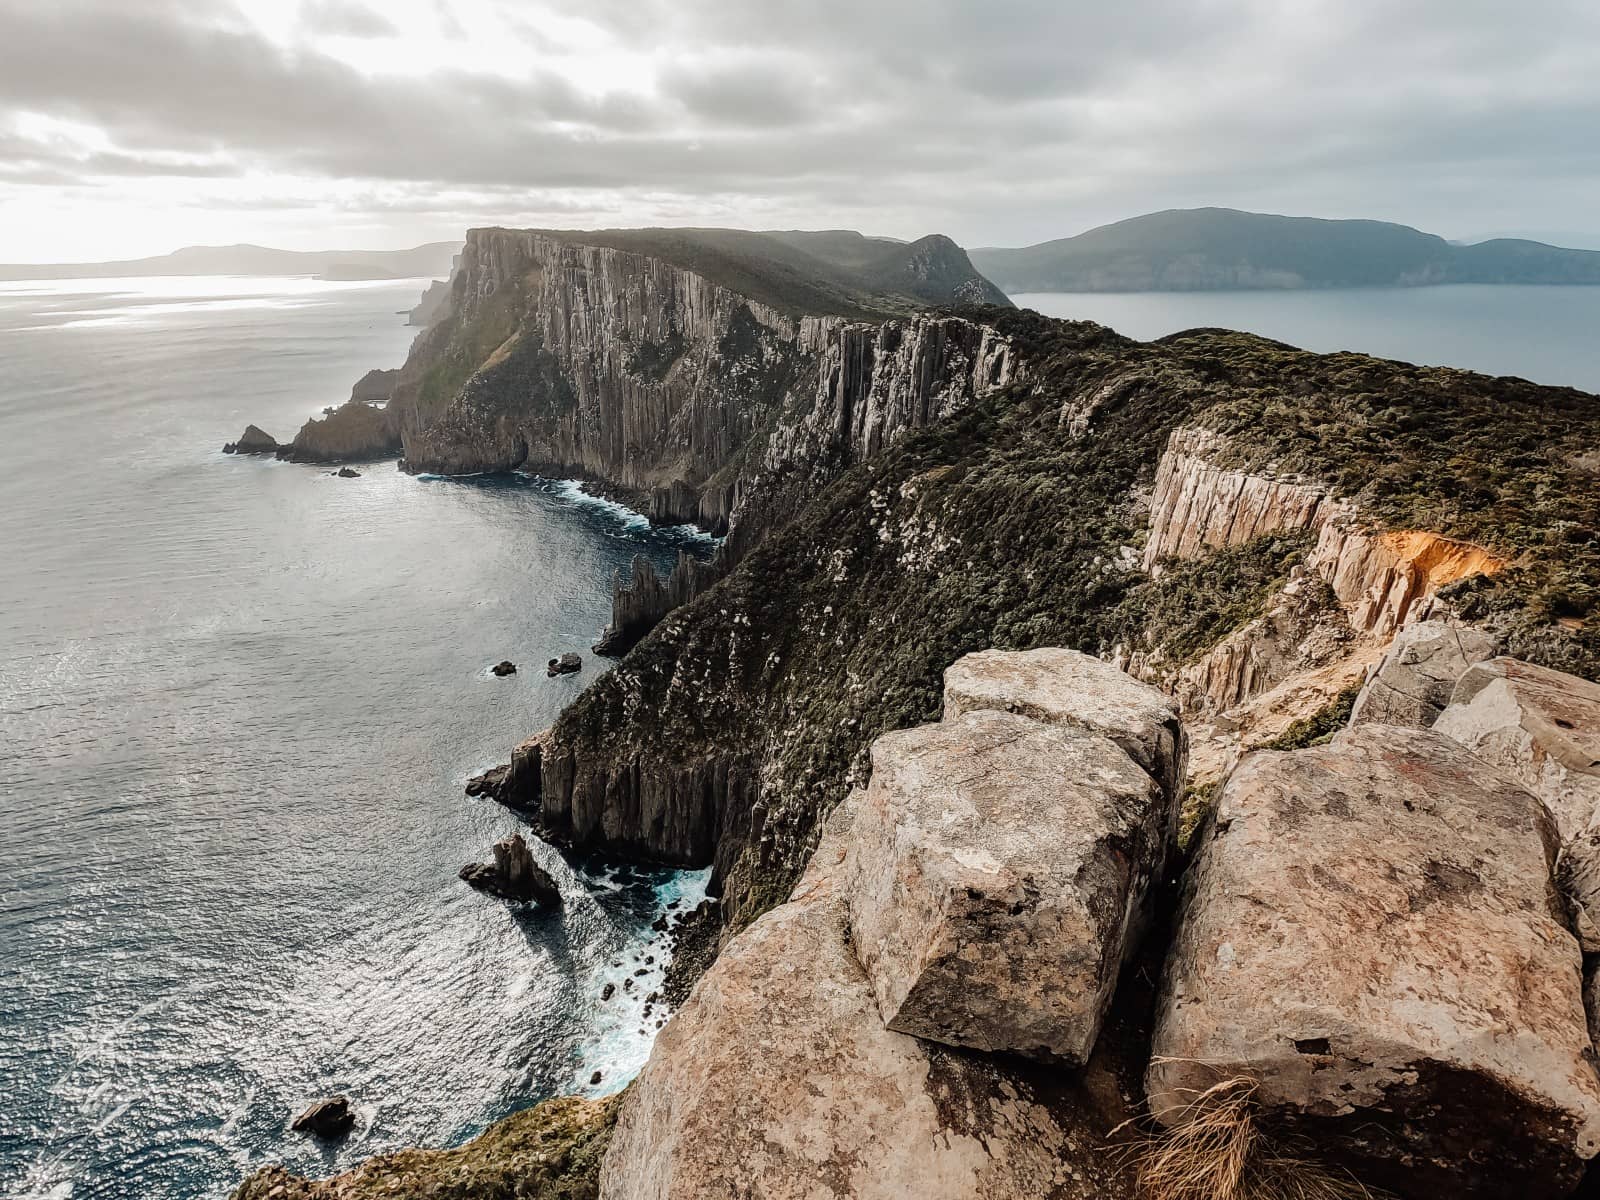
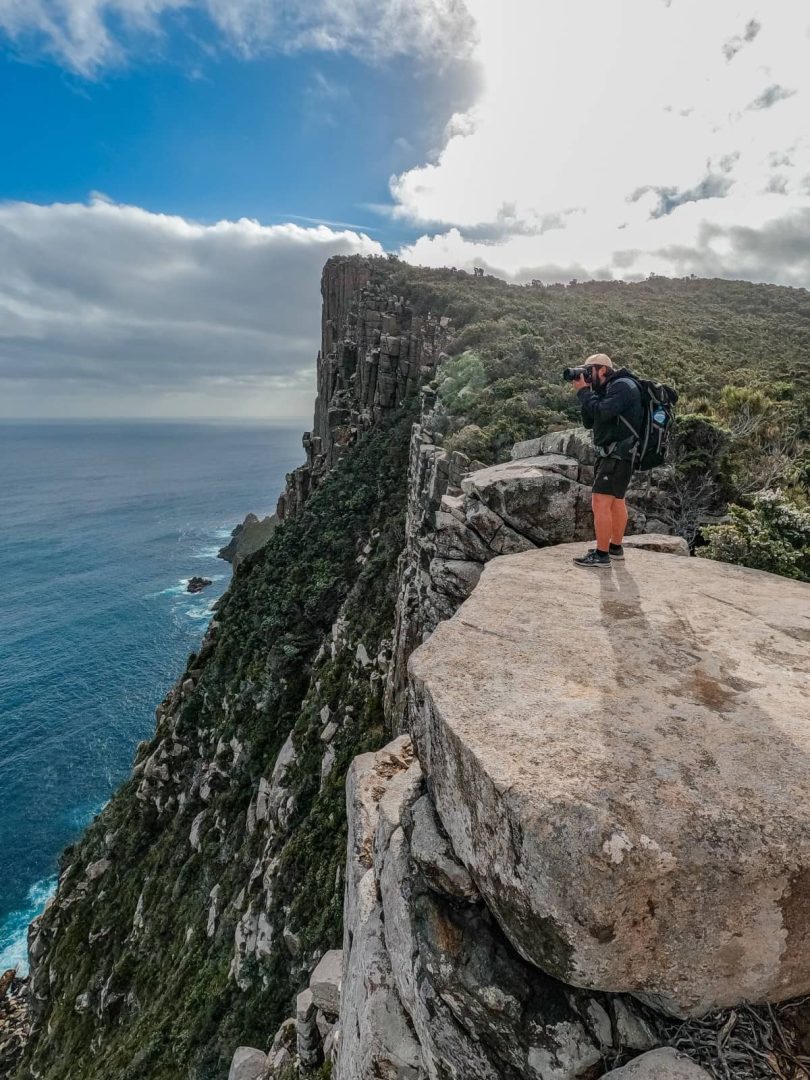
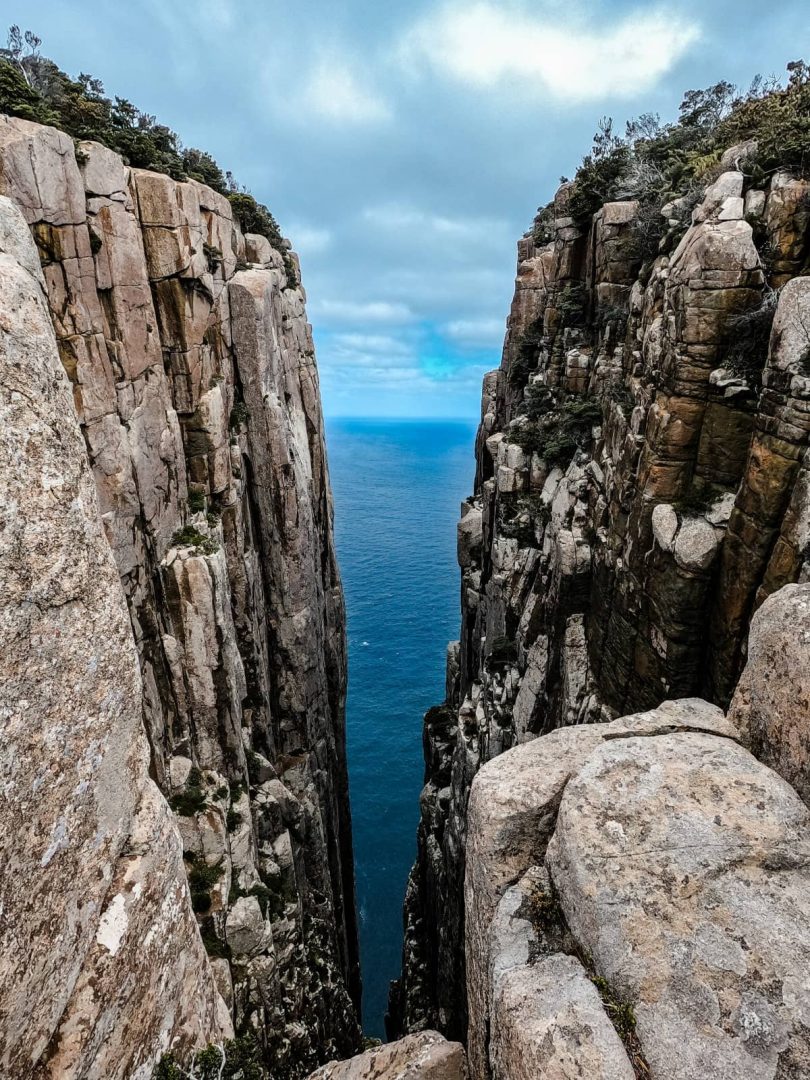
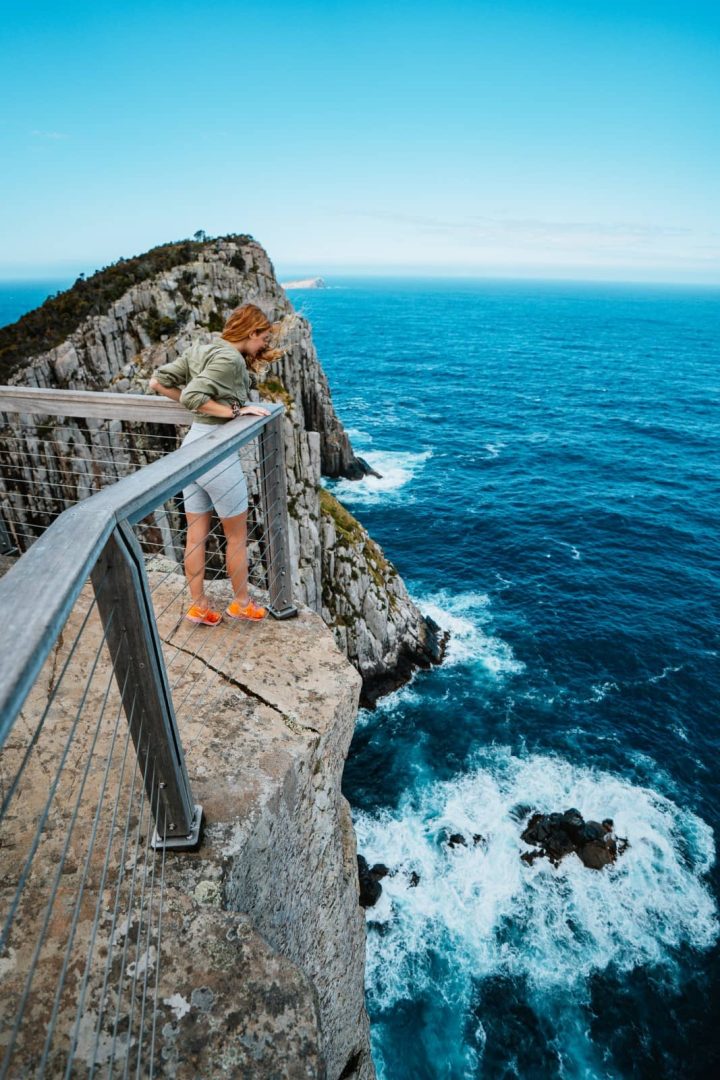
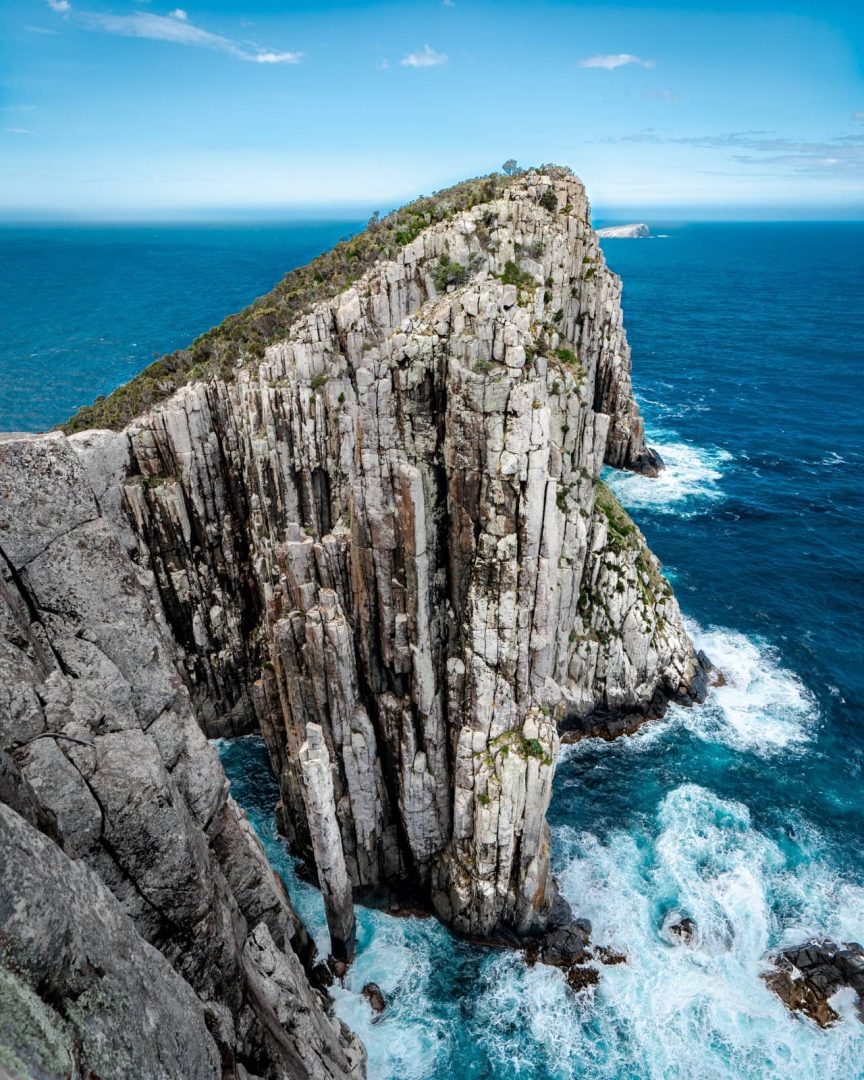
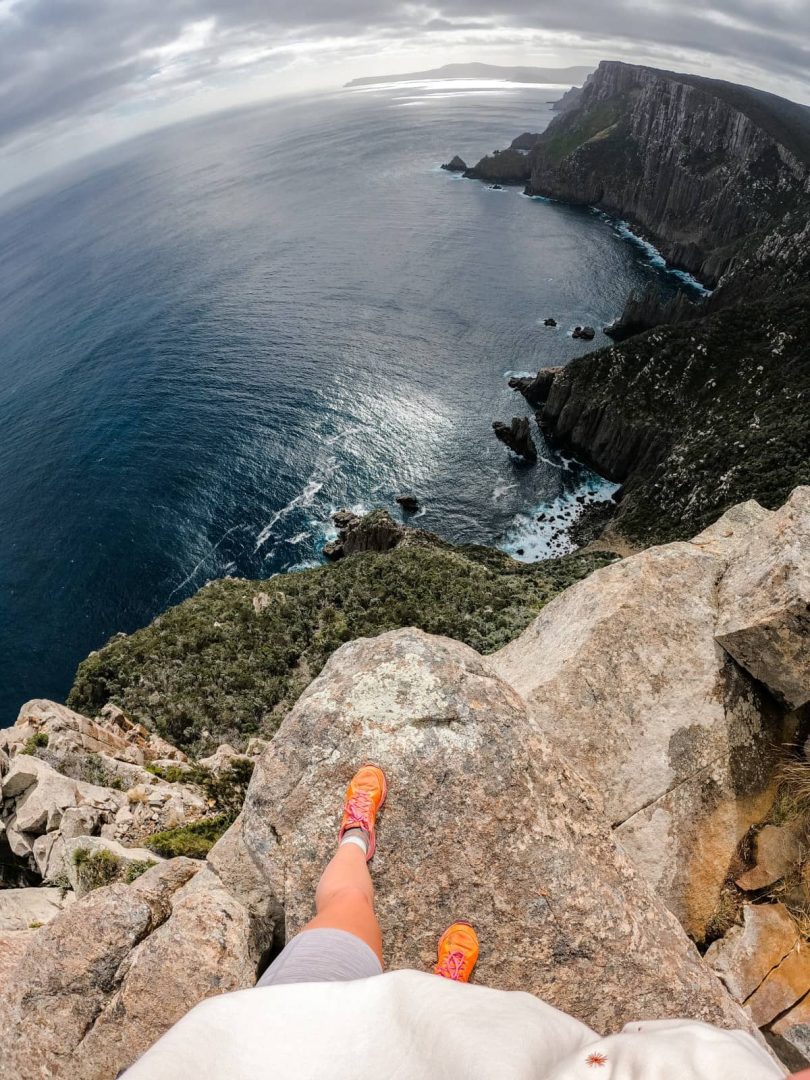
Then, there’s a moment when the landscape opens up and you realise how exposed and dramatic this coastline really is. Absolutely mindblowing!
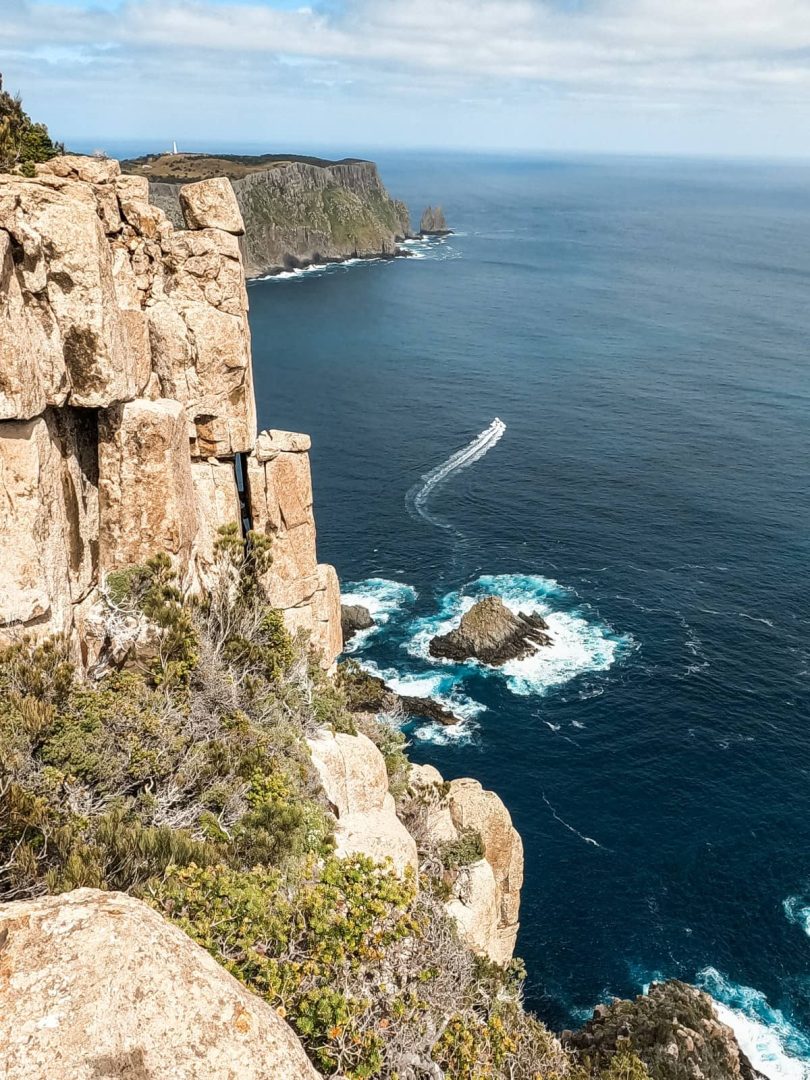
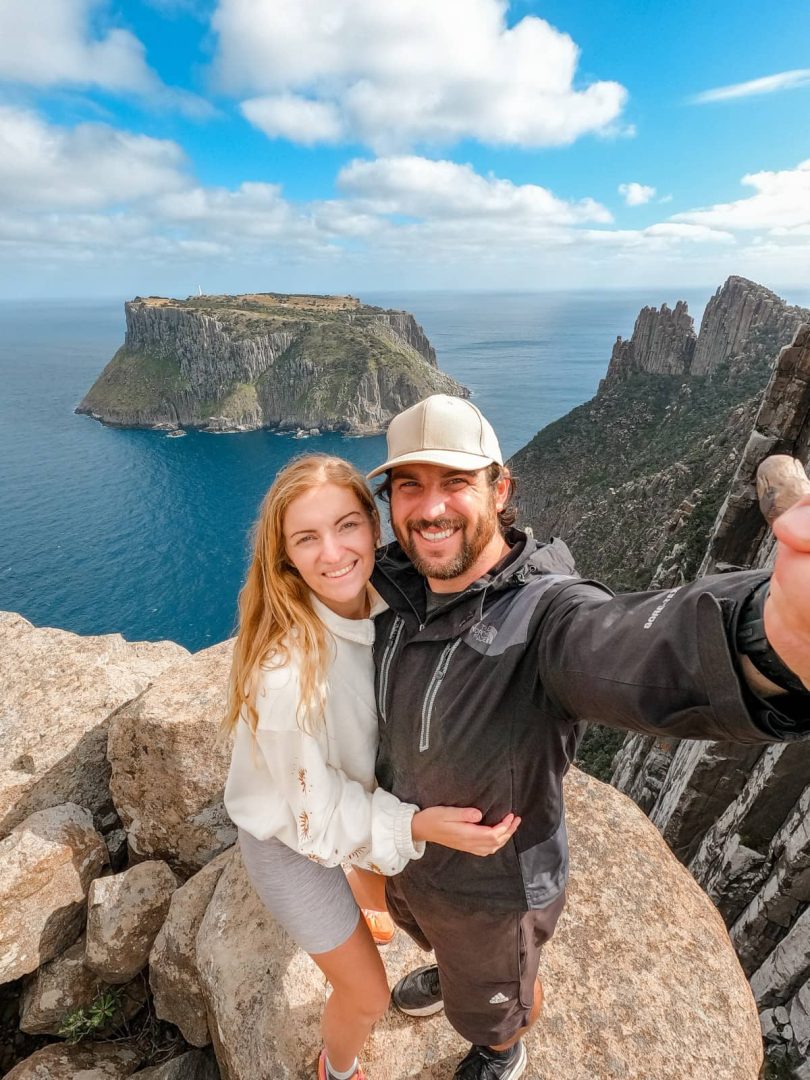
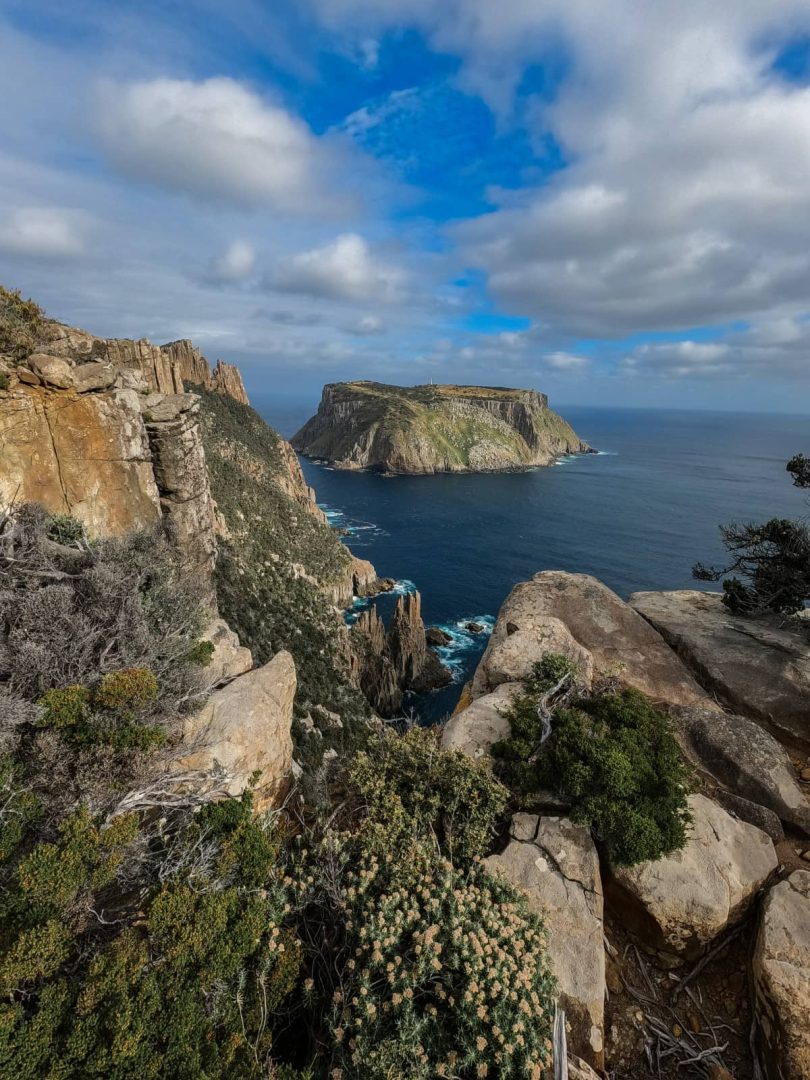
Cape Pillar itself feels massive. The cliffs drop straight into the ocean, Tasman Island sits out in the distance, and honestly you feel like you’re at the edge of the world.
Definitely make sure to check out The Blade, it’s a short detour that’s absolutely worth the effort.
Although the terrain isn’t overly technical, the distance adds up.
This took us most of the day, including time at the cape itself, and we were very ready to sit down by the time we got back to camp LOL.
We left our overnight gear at Bare Knoll and headed out with a lighter day pack. It made a massive difference!
Day 3: Mount Fortescue and Cape Hauy (16km, 7 hours)
Day 3 is shorter on paper, but it’s the toughest day physically.
The climb up Mount Fortescue starts almost straight away, and honestly, it’s very difficult. There are long stair sections, steady elevation gain, and very few breaks.
But once you crest the climb, the track becomes more forgiving and the views start to open up again.
You’ll pass through the forest, hit coastal sections, and eventually reach the junction for Cape Hauy.
There’s a rest area where you can leave your heavy pack and walk that stretch to Cape Hauy with the minimum necessary, it’s about 2 hours total.
It’s all very safe, but apparently the local birds have learnt how to get into unattended backpacks! So we’re told to cover the zips and pockets with the rain cover so they aren’t accessible.
From the rest stop, the track to Cape Hauy is beautifully built, with endless stone steps and exposed headlands, and it finishes at one of the most impressive lookouts of the whole hike.
Once you get to the end, you’ll look straight down to the Totem Pole, a famous sea stack that rock climbers travel from all over the world to summit.
Then, it’s back to the rest area to pick up your things and walk back to Fortescue Bay.
You can either sleep at Fortescue Bay campground, or drive back to your accommodation (if you have the legs for it).
We were COOKED after all these days hiking. Our legs were sore 2 days after LOL, but honestly it was absolutely worth it!
Day 4: Cape Raoul (14km, 5-6 hours)
If you can only do one cape, make it this one! And if you want to tackle all three Capes, here’s what you need to know.
Cape Raoul is a standalone, out-and-back day hike on the western side of the Tasman Peninsula, near Port Arthur.
You’ll park at the Cape Raoul trailhead carpark, which is sealed most of the way with a stretch of well-maintained gravel at the end.
There are public toilets at the trailhead and a logbook to sign before you start.
The track quality is excellent the whole way, but there are plenty of stairs and steady climbs that make it feel much longer, tbh.
Not far from the start, there’s a turnoff to Shipstern Bluff, one of the world’s most famous big-wave surf breaks.
You don’t need to do the detour (you’ll see it from the Cape anyway) but it’s a fun one! It will add around 2-3 hours to the hike though, so you might want to leave it for another day.
Things to know before doing the Three Capes for free
Permits needed
You’ll need a Parks Pass to do the Three Capes Track, even when hiking it for free.
We used the Holiday Pass, which covers you for multiple parks over 2 months. It’s the best value for money, the other pass is for 1 day only and it’s quite pricey.
You also have to display your pass in your car at Fortescue Bay. Rangers do check, and it’s an easy thing to forget after a long drive, so get it sorted out before doing the hike.
There’s no separate permit or booking required for the track itself. You don’t need to register online, apply for dates, or check in with anyone before you start walking.
What to book in advance
The campsite at Fortescue Bay is the only thing you absolutely have to book before you go. Save your spot online, you’ll pay on location.
If you’re not renting a car, consider arranging transfers ahead of time. Public transport is basically non-existent.
Aside from that, there’s nothing else you must book for the free Three Capes Track itself. The Bare Knoll camp is free!
What gear you actually need
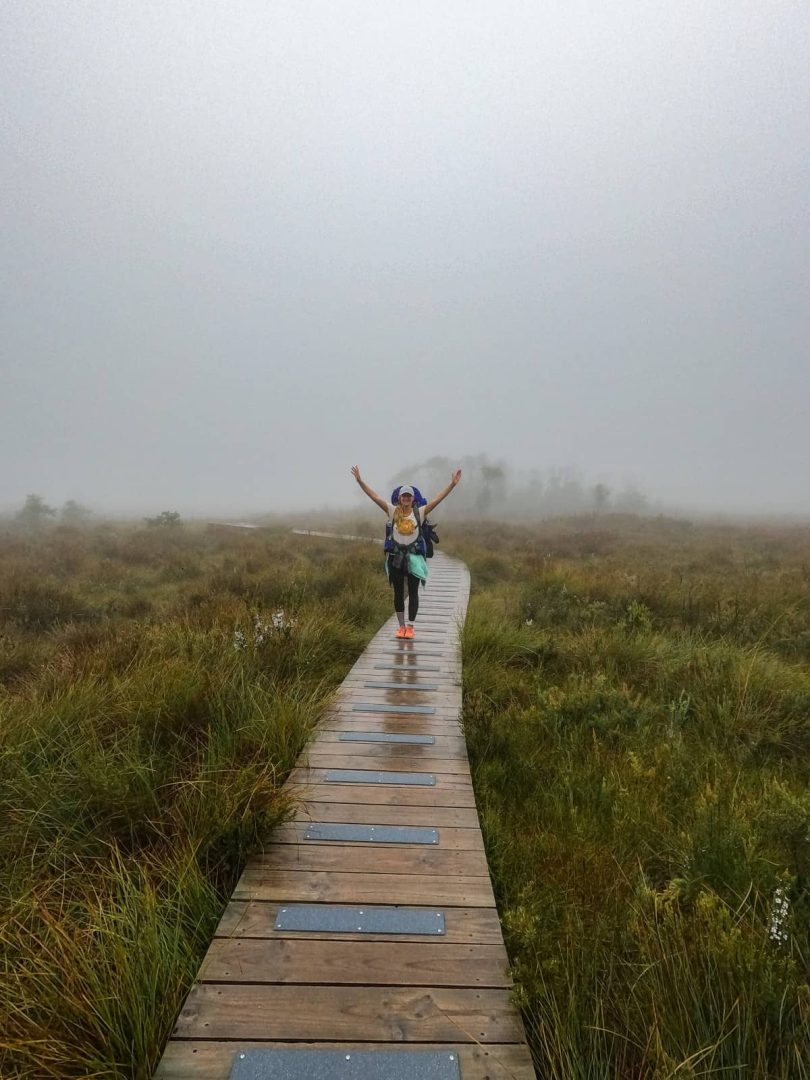
Tasmania’s weather doesn’t mess around, and it can change fast. We had blue skies one minute and rain the next, so being prepared matters more than having fancy gear.
The weather changes QUICKLY! It was good minutes before Bring a rain jacket even in summer
The camp sits quietly in the forest, and after a big coastal day yesterday, it felt like the right place to slow things down.
Here are some things we absolutely recommend bringing:
- Head torch
- First aid kit
- Phone with offline maps downloaded
- Warm insulating layer (even in summer)
- Rain jacket
- Lightweight long pants
- Water bottles or bladder carrying at least 2-3 L
- Water treatment method as a backup
You don’t need anything extreme. The track is well formed, camps are set up, and you’re never scrambling or bush-bashing.
Also, there are heaps of outdoor stores in Hobart, so don’t worry if you forget something.
That said, the biggest mistake we think people make is overpacking. If something doesn’t serve a clear purpose on this hike, leave it behind.
Water on the track
Water isn’t hard to find, but it does require a bit of planning.
There are rainwater tanks at Bare Knoll Camp, and there’s also water available along the Cape Pillar section near the huts used by the paid walkers.
When we went, all the tanks had water, but you should never assume they’ll be full!
We carried ~3 L per person and refilled whenever we could. For the longer days, that was plenty, but we were also lucky with cooler conditions.
You should always carry a backup water treatment option, even if you plan to use the tanks. They’re rain-fed, and levels can change quickly after dry periods.
There’s no reliable water once you’re moving between sections, so you need to start each day with enough to get you through.
Food planning for the track
We kept it simple and carried food that didn’t need much prep, didn’t weigh a tonne, and was easy to eat when we were tired.
For meals, we brought lightweight dinners that just needed hot water and easy breakfasts we could eat quickly.
But snacks matter more than you think! We ate little and often throughout the day, especially on days 3 and 4, and that made a big difference to how steady our energy felt.
Avoid bringing food that:
- Takes ages to cook
- Requires lots of washing up
- You only eat when you’re at home
If it feels like “a treat” rather than fuel, it probably doesn’t belong in your pack.
Best time to do the Three Capes Track
We did the Three Capes Track in late summer, early autumn and loved it! It wasn’t too hot and it’s not peak season, so we weren’t worried about Bare Knoll overflowing.
That said, every season in Tasmania comes with trade-offs.
- Summer (December-February) has the best weather and longest days, which makes the big distances easier. But it’s also the busiest time, so camps and accommodation around the peninsula book out fast.
- Autumn (March-May) has cooler days and fewer people, which we really liked. Shorter daylight hours mean you need to be a bit more organised with early starts.
- Winter (June-August) is quieter but cold, wet, and unpredictable. It’s the worst time to do it in our opinion. There’s a risk of snow, strong winds, and limited daylight.
- Spring (September-November) is a good middle ground with improving weather and longer days. Conditions can still change quickly, and you’ll want to be ready for wind and rain at any time.
But regardless of when you go, always plan for Tassie doing its own thing weather-wise! It can rain even in summer.
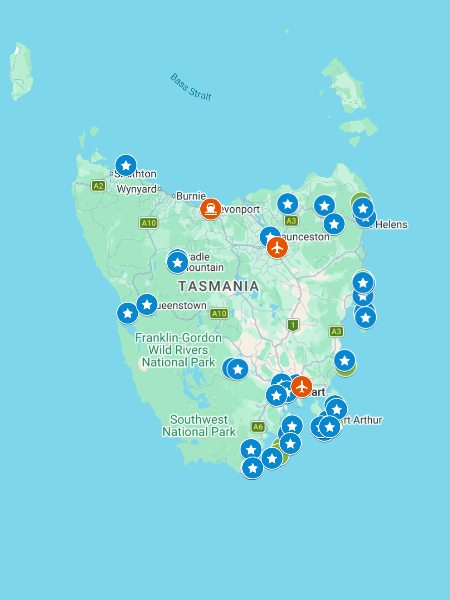
FREE map of this hike
Top Tips
Start slower than you think you need to! The distances on paper don’t look outrageous, but the constant stairs and elevation changes add up quickly.
Also, be ruthless when packing your bag. If you don’t think you’ll use something on day 1 or 2, you probably won’t use it later. A lighter pack makes a BIG difference on the Mount Fortescue climb.
Try to leave early on the big days too, it takes the pressure off a bit. Having a daylight buffer means you can stop, rest, and actually enjoy where you are instead of watching the clock.
Finally, don’t underestimate how exposed the track gets. Even on calm days, wind can whip through the headlands fast. Keep warm layers easy to reach instead of buried at the bottom of your pack.
Did you know?
The Three Capes Track sits on Palawa Country. Aboriginal people have lived on the Tasman Peninsula for over 40,000 years, using the coastline for food, travel, and cultural practices long before any walking tracks existed.
And the coastline you’ll walk along was formed over 300 million years ago! When Tasmania was still part of Gondwana. The dolerite columns and sharp cliff edges you see are the result of ancient volcanic activity followed by relentless Southern Ocean erosion.
FAQs
Can you do Cape Pillar in one day?
Yes, you can if you’re capable of walking 29 km in one day. We don’t recommend it unless you’re an experienced hiker, it’s much tougher than it looks.
Is the Three Capes Track dog-friendly?
No, it’s not dog-friendly as it’s in National Park grounds.
Ready to tackle the Three Capes? Sort these out first!
If you’re keen to turn this 4-day hike into reality, these are the few things worth sorting before you hit the Tasman Peninsula:
- National Parks Pass, get the Holiday Pass here.
- Fortescue Bay camping, book it well in advance here. At the time of writing it costs $13 per night for 2. Remember that Bare Knoll is free and doesn’t need booking.
- Car hire, we recommend Discover Cars or Booking’s car rental feature. Both offer pick up from Hobart, check them and get the one with the best deals for your dates.
Our Essential Travel Toolkit
🤩 Wise Card – Online bank to hold money in different currencies worldwide and lowest fees in the market! (FREE debit card here)
🤩 Trip.com – Consistently great accommodation and hotel deals.
🤩 Hostelworld – Looking for the cheapest accommodation? We especially love the “book now, pay later” feature.
🤩 Discovercars.com – Best range, super easy to compare prices rental car and motorhome prices.
🤩 Viator.com – Easily book tours and experiences at the lowest rate. Great selection all over Australia.
🤩 Tripadvisor.com – Other than our website…😉 the best place to find things to do
🤩 Airalo – eSIM store that solves the pain of high roaming bills by giving travelers access to eSIMs (digital SIM cards).
🤩 Caravan RV Camping – Traveling Australia in a van, caravan or bus? This is the best place to get all your gear.